Making an Escape Room with only HTML and CSS
Beware! This post includes spoilers!
I recently built an escape room game called CSScape Room. This isn’t my first JavaScript-free web game, but HTML and CSS have evolved significantly since my previous attempts, with newer additions allowing for more complex selectors and native interactions. Rather than saving this idea for a game jam, I built it purely for fun, which freed me from theme constraints and time pressure.
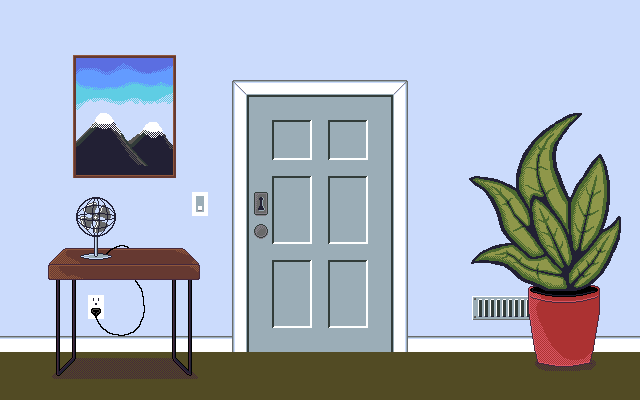
I’ve enjoyed escape room games since childhood, and it was nostalgic to recreate that experience myself. This project pushed my artistic limits while challenging me to design puzzles and translate them into complex HTML and CSS. The learning process was fun, challenging, and sometimes tedious—mostly through trial and error.
Process
My creative process isn’t linear—it’s a blend of designing, puzzle creation, and coding that constantly influences each other. I frequently had to redesign or recode elements as the project evolved. There was also that time I accidentally deleted half my CSS because I wasn’t backing up to GitHub… lesson learned! 😬
This might sound chaotic, and honestly, it was. If you’re wondering where to start with a project like this, I began by prototyping the room navigation system. I figured that was the minimum viable feature—if I couldn’t make that work, I’d abandon the project. The solution I eventually found seems simple in retrospect, but I went through several iterations to discover it.
This flexible approach makes sense for my creative projects. As I build something, both the in-progress work and my growing skills inevitably influences the entire project. I’m comfortable with this non-linear process—it also suits my ADHD brain, where I tend to lose interest if I work on the same thing for too long.
Artwork
I’d wanted to design a pixel art-styled game for some time but never felt confident enough to attempt it during a game jam because of the learning curve. I watched tutorials from Adam Yunis and Mort to get a crash course in pixel art best practices.
Initially, progress was slow. I had to figure out 2D perspective with vanishing points, determine a color palette, practice shading techniques, and decide how much detail to include. While I tried to adhere to pixel art “rules,” I definitely broke some along the way.
One challenge I set for myself was using only 32 colors to capture the feeling of an older gaming console. Once I got comfortable with shading and dithering, working within this constraint became easier. An added benefit to using 32 colors was it resulted in smaller image sizes—the game’s 79 images account for only about 25% of the total payload.
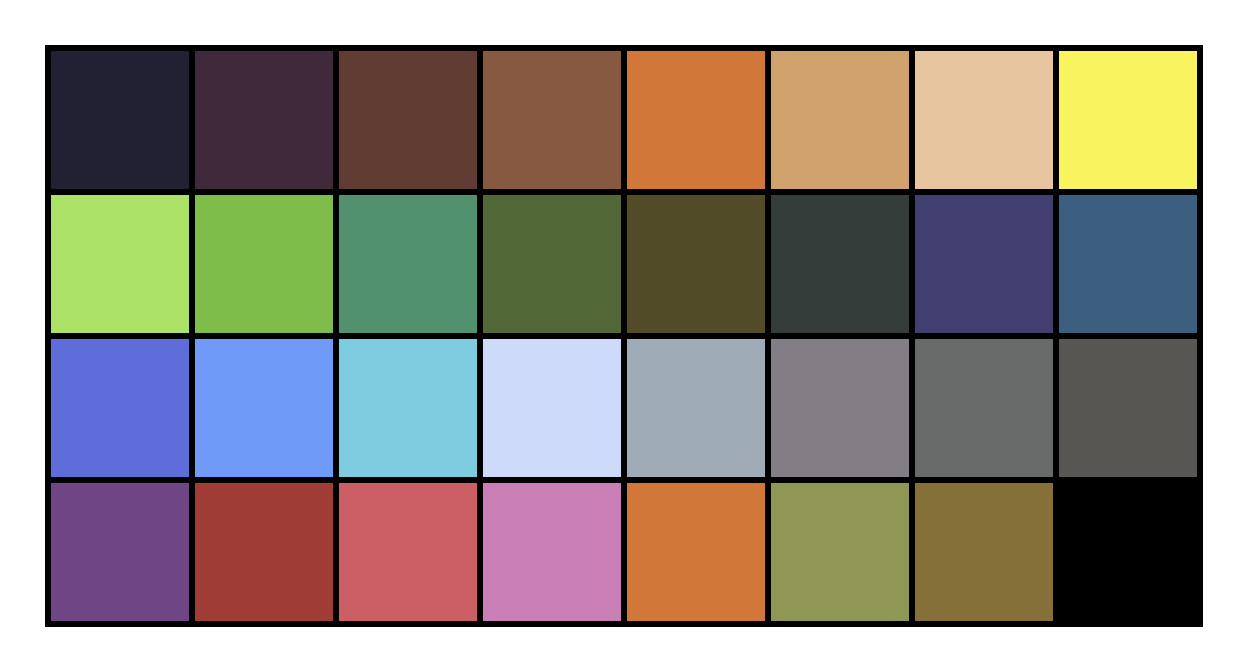
I attempted to design sprites using dimensions in multiples of eight, but I’ll admit I became less strict about this as the project progressed. At a certain point, I was struggling enough with the color and styling limitations that this guideline became more of a starting point than a rule.
I considered creating my own font, but after exhausting myself with all the artwork, I opted for Google’s PixelifySans instead.
Almost all animation frames were individually drawn (except for the “one” TV animation). This was tedious, but I was determined to stay true to old-school techniques! I did use CSS to streamline some animations—for instance, I used animation-direction: alternate on the poster page curl to create a palindrome effect, halving the number of required sprites.

Mechanics
Like my previous game Heiro, this project primarily uses checkbox and radio button mechanics. However, the addition of the :has() pseudo-selector opened up many more possibilities. I also utilized the popover API to create more detailed interactions.
Checkbox and Radio Selection
Triggering interactions by toggling checkboxes and radio buttons isn’t new, but the :has() selector is a game-changer! Before this existed, you had to structure your markup so interactive elements were siblings. The :has() selector makes this far more flexible because you no longer need to rely on a specific HTML structure.
#element {
  display: none;
}

:has(#checkbox:checked) #element {
  display: block;
}
Using this pattern, :has() looks for #checkbox anywhere on the page, meaning you don’t have to rely on #checkbox, its corresponding <label>, or #element being siblings. The markup structure is no longer a constraint. Most of this game functions on toggling checkboxes and radios to unlock, collect, and use items.
Navigation
I almost gave up on the current implementation, and used basic compass notation to avoid visual transitions between directions. After several failed attempts, I found a solution. The tricky part was determining how to transition into a direction from either left or right, depending on which arrow was clicked.
My solution is conceptually simple but difficult to explain! First, I used radio buttons to determine which direction you’re facing (since you can only face one direction at a time). Second, I needed a way to determine if you’re entering a direction from west or east. This required eight radio buttons—two for each direction.
For example, if you’re facing east (having come from facing north), you have two possible directions to go: west (returning to face north) or east (to face south). I needed to make the radio buttons visible that would take you north from east, and south from west.
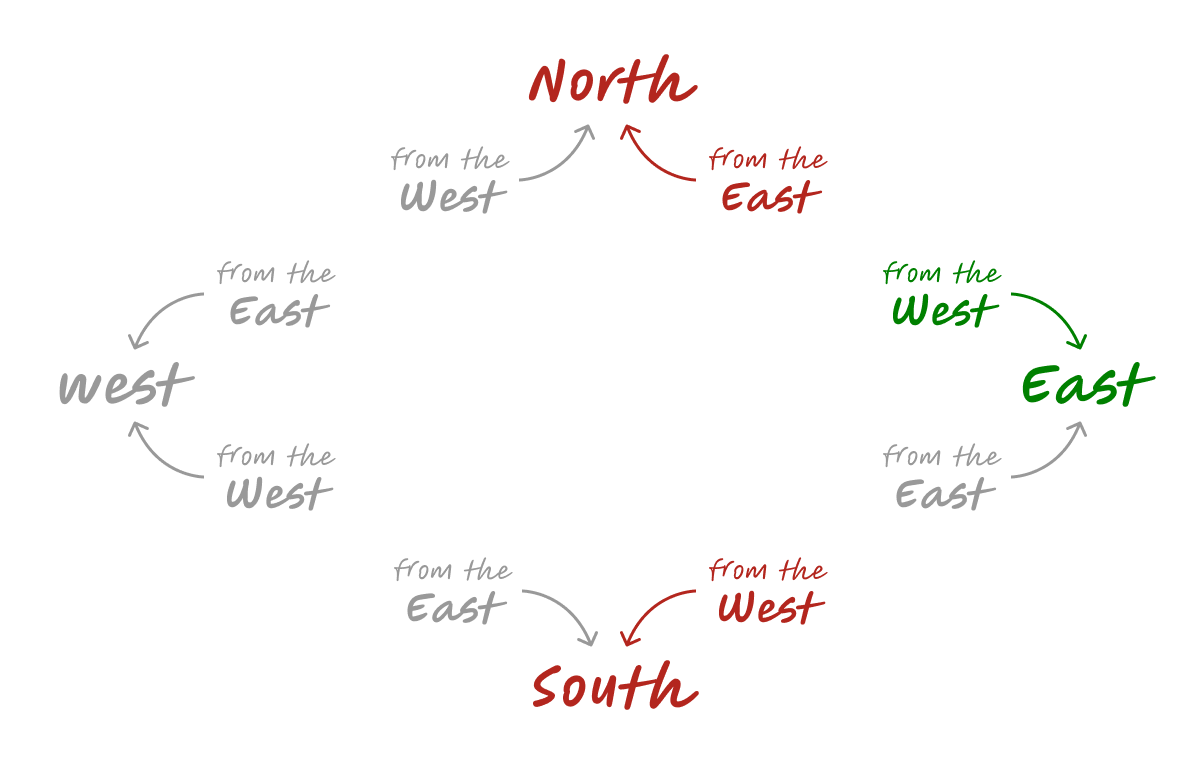
The CSS looks something like this:
:has(#east-from-west:checked) :is(
  [for="south-from-west"],
  [for="north-from-east"]) {
    display: block;
}
This pattern was implemented for each direction, along with animations to ensure each room view slid in and out correctly.
Zooming In
I initially focused so much on checkbox mechanics that I assumed I’d need the same approach for zooming in on specific areas. Then I had a “Duh!” moment and realized the popover API would be perfect. Here’s the basic markup for looking at an individual book:
<button popovertarget="book">Zoom in</button>

<div id="book" popover>
  <!-- Book content goes here -->
  <button popovertarget="book" popovertargetaction="hide">Close</button>
</div>
Turning the Lights Off
I procrastinated on implementing this feature because I thought I’d need to create darkened variations of all artwork. I don’t recall what inspired me to try blend modes, but I’m glad I did—the solution was surprisingly simple.
When the light switch checkbox is toggled, a <div> becomes visible with a dark background color and mix-blend-mode: multiply. This multiplies the colors of the blending and base layers, resulting in a darker appearance.
Playing the Crossword
This required surprisingly complex CSS. Each square has three letters plus a blank tile, meaning four radio buttons. The :checked letter has a z-index of 3 to display above other letters, but also has pointer-events: none so clicks pass through to the next letter underneath (with z-index: 2). The remaining tiles have a z-index of 1.
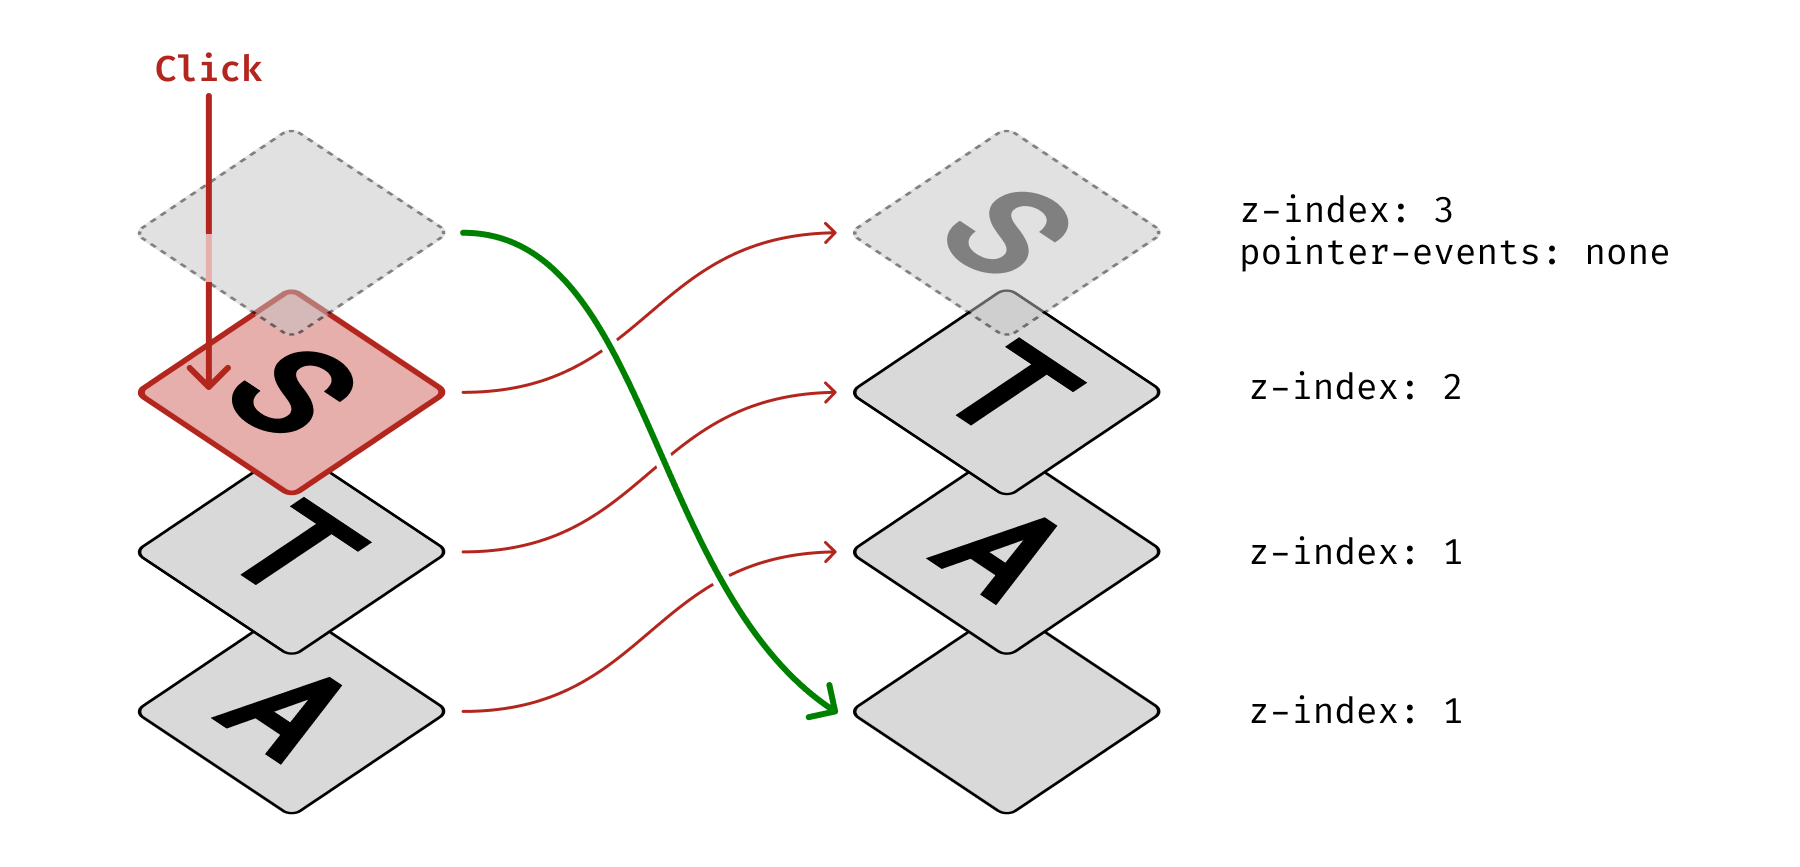
The CSS becomes even trickier when the last tile is :checked, requiring some creative selector gymnastics to target the first radio button in the stack again.
Tools
I created all artwork using Aseprite, which is specifically designed for pixel art. I probably only used a fraction of its features, and I’m not sure it actually made my life easier—it might have made things more difficult at times. I’m not giving up on it yet, though. I suspect I’ll occasionally discover features that make me think, “Oh, that’s way easier than what I was doing!”
I started coding with basic HTML and CSS but eventually found navigation difficult with such a long HTML file. It also became tedious writing the same attributes for every <img /> element. I migrated the project to Eleventy to improve organization and create custom shortcodes for simplifying component creation. I used the html-minifier-terser npm package, which integrates well with Eleventy.
I chose native CSS over Sass for several reasons:
- CSS now has native nesting for better organization and leaner code
- CSS has built-in variables
- HTTP/2 handles asset loading efficiently, eliminating the major benefit of bundling CSS files
The game uses 12 CSS files with 12 <link rel="stylesheet" /> tags. The only Sass feature I missed was the ability to loop through style patterns for easier maintenance, but this wasn’t a significant issue.
The game is hosted on GitHub Pages. During deployment, it runs an npm command to minify CSS using Lightning CSS. I mentioned accidentally deleting half my CSS earlier—this happened because I initially used Eleventy’s recommended approach with the clean-css npm package. I strongly advise against using this! This package doesn’t work with native CSS nesting. While losing code was frustrating, I rewrote much of it more efficiently, so there was a silver lining.
Nice to Haves
I initially wanted to make this game fully accessible, but the navigation system doesn’t translate well for screen reader users. I tried implementing a more compass-like navigation approach for keyboard users, but it proved unreliable and conflicted with the side-to-side approach.
Adding text labels for interactive elements was challenging because you can’t track the :focus state of a <label> element. While you can track the :focus of the corresponding <input />, it wasn’t consistently reliable.
The main keyboard accessibility issue is that the game exists as one long HTML page. When you navigate to face a different direction, keyboard focus remains elsewhere on the page, requiring extensive tabbing to reach navigation elements or item selection.
I ultimately decided to make the game deliberately inaccessible by adding tabindex="-1" to all keyboard-accessible elements. I’d rather users recognize immediately that they can’t play with assistive technology than become frustrated with a partially broken experience.
Sound would have been a nice addition, but I encountered the same issues as with my previous game Heiro. You can toggle the visibility of an <embed> element, but once it’s visible, you can’t hide it again—meaning there’s no way to toggle sound on and off.
Conclusion
CSScape Room was a fun but exhausting four-month project. It began as an experiment to see if creating a JavaScript-free escape room was possible—and the answer is definitely yes. I’ve only touched on some aspects here, so if you’re interested in the technical details, check out the source code on GitHub. Finally, I’d like to thank all my playtesters for their valuable feedback!